

Understanding Why a Monitor Arm Matters
A good monitor arm does more than just hold your screen off the desk. It directly affects comfort, posture and how efficiently you use your workspace.
Many people only think about screen size and resolution when upgrading a setup, but the mounting solution is just as important. A quality arm lets you position your monitor at the correct height and distance, helping reduce neck, back and eye strain over long days. It also clears valuable desk space, which is especially useful on compact home office desks or when you’re working with limited depth on straight workstations.
Ergonomics is the main driver here. Ideally, the top of your screen should sit roughly at eye level, with the monitor about an arm’s length away. Without an adjustable arm, you’re forced to adapt your body to the screen instead of the other way around. Over time, that can lead to poor posture and fatigue, especially if you’re using multiple displays or a large, ultra-wide monitor.
There’s also the question of flexibility. If you share a workstation or regularly switch between sitting and standing at a height adjustable workstation, a fixed stand quickly becomes a nuisance. A well-chosen arm lets you tilt, swivel and rotate your monitor in seconds, so different users can work comfortably without pulling stacks of books or boxes into service as DIY risers.
Matching Your Monitor Arm to Your Desk and Workspace
Before looking at models and specs, it’s worth checking what your desk can actually support. The way your workstation is built will strongly influence the type of arm you need.
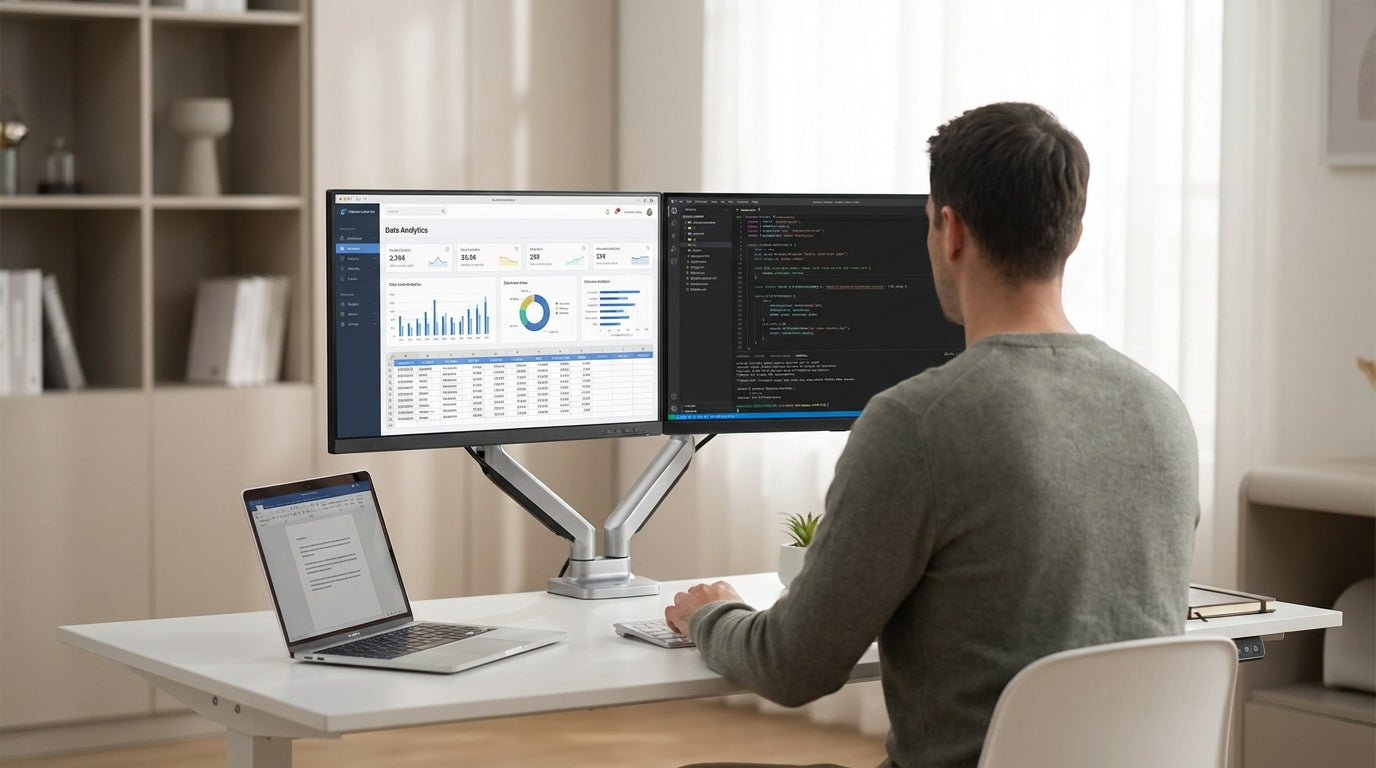
Most arms use either a clamp that grips the edge of the desk or a grommet mount that bolts through a pre-drilled hole. On thinner tabletops, which are common on budget straight desks and some compact single person workstations, you’ll want to confirm the minimum thickness the clamp requires, so you don’t damage the surface. If your desk already has cable ports, a grommet mount can give a cleaner, more secure installation while keeping the arm closer to the centre of the desk.
Desk shape also plays a role. For L-shaped desks and corner workstations, a centrally mounted arm with long reach makes it easier to position the monitor directly in front of you, even if you’re seated at one wing of the desk. On deep executive tops or larger home office desks, a shorter arm may be fine because you’re not battling for space, but you’ll still want enough extension to fine-tune viewing distance.
If you’re using an adjustable or sit-stand setup, check that any chosen arm is rated for use on height adjustable workstations. Cheaper arms may wobble or drift when the desk moves up and down, especially with heavier monitors. A sturdy model designed for dynamic setups will maintain position smoothly and feel stable at full standing height, which is crucial for comfort and productivity.
Key Features and Specs to Look For
Once you know how the arm will mount, it’s time to dig into specifications. Compatibility and range of movement are the big ones to get right.
Start with weight capacity. Every arm has a minimum and maximum monitor weight it’s designed to support, often listed in kilograms. Weigh your screen with the stand removed if possible, or check the manufacturer’s specs, then allow some buffer. This is particularly important for larger displays and ultra-wides, which may need a heavy-duty model from a specialised range of monitor arms. The gas spring inside many arms is tuned to a specific weight range; if your monitor is too light or too heavy, it won’t hold position properly.
Next, confirm VESA compatibility. “VESA” refers to the standard pattern of mounting holes on the back of the monitor, like 75 x 75 mm or 100 x 100 mm. Most business and office screens support VESA mounting, but some ultra-thin or all-in-one models may need an adaptor. It’s worth double-checking this detail before you commit to any particular arm. If you plan to upgrade screens regularly, choose a model that supports multiple VESA patterns for future-proofing.
Finally, look closely at the movement range: height adjustment, tilt, swivel and rotation. For a flexible workspace, aim for a full 360° rotation (handy if you like to work in portrait mode), along with a generous vertical adjustment range so you can fine-tune height for both sitting and standing. Arms with multiple joints and an articulated design give more freedom but can be trickier to keep perfectly aligned, while simpler pole-mounted arms are robust and tidy but a little less flexible.
Single vs Dual Arms and Planning for Multi-Monitor Setups
Your screen configuration should guide whether you choose a single or multi-monitor arm. Think about how you actually work day to day.
If you use one main screen for focused tasks, a single arm is often enough, especially on smaller single person workstations where desk depth is limited. For users who rely heavily on extra screen real estate—developers, designers, analysts—a dual arm or a multi-monitor bar makes more sense. With a dual setup, you can keep one monitor directly in front of you as the primary display and angle the second slightly to the side, reducing neck twisting while still keeping key information in view.
Consider how the layout will work with your desk shape. On a compact straight desk, two individual arms can provide more flexibility than a single dual-arm unit, letting you stagger heights or angles more easily. However, in a corner or on an L-shaped desk, a dual arm mounted at the internal corner can create a seamless, curved display arc that’s very comfortable for long sessions. It’s also wise to leave room for future expansion if you think you might add another screen later.
Multi-monitor setups are heavier and place more stress on the mounting point, so choosing a robust option from a dedicated monitor arms range matters. Look for reinforced joints, a solid clamp or grommet, and clear documentation around maximum combined weight. It’s better to over-spec here, particularly on thinner tabletops and home office desks where you may not want to risk flexing or damage over time.
Creating a Clean, Ergonomic and Cable-Free Setup
Once the arm is installed, small details make a big difference to comfort and tidiness. This is where ergonomics and cable management come together.
First, dial in your ergonomic positioning. Sit or stand in your usual working posture and adjust the monitor so the top bezel is roughly at eye height, with a slight upward tilt if needed. Keep the screen about an arm’s length away and centred with your keyboard to avoid twisting your neck or torso. If you move between sitting and standing, use a height adjustable workstation and monitor arm combo that can be repositioned quickly without tools, and save your preferred heights as mental reference points.
A tidy cabling setup not only looks better, it also prevents cords from snagging when you reposition your screen. Many modern arms include channels or clips along the arms for routing power and display cables. Pair these with under-desk trays, cable spines or floor covers from a dedicated cable management range to keep everything out of the way, especially on open-leg straight desks and minimal home office desks. This also makes cleaning easier and reduces trip hazards in busier offices.
Finally, think of your monitor arm as part of a broader workstation system rather than a stand-alone accessory. Combining the right arm with suitable workstation components—such as CPU holders, document trays and keyboard platforms—lets you keep every tool within comfortable reach. Whether you’re building out corner stations, corner workstations or streamlined single person workstations, taking a holistic view helps you create a space that’s ergonomic, efficient and easy to keep organised over the long term.


